What is 3D Scanning?
3D scanning is the digital capture of a part in three dimensional space.
Once you have a digital record of your part the data can be used for many purposes including reverse engineering, inspection, animation, historic record and virtual reality.
Point Cloud Data
You have a part you wish to scan. Imagine now that you spray that part with a can of paint, with the individual specs of paint landing on the surface. If you were now able to remove the part without touching the paint you would be left with a 3D “cloud” made from the specs of paint, these would define the external shape of your part. This is what a point cloud is.
Almost all 3D scanners produce a point cloud, whether they are long range scanners for capturing data of large areas or industrial x-ray machines capable of capturing the geometry of the smallest parts, the details of which can not be seen with the human eye.
A simple point cloud is purely a long list of XYZ coordinates. Each coordinate is related back to the scanner used to create the cloud. More complicated point clouds will also contain RGB, intensity and normal information. The normal component defines which direction the scanner was positioned from the point. This is especially useful in the processing of the point cloud into a mesh.
Mesh Data
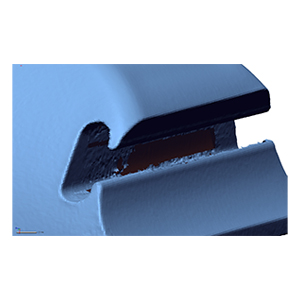
A mesh, triangulated or polygon model is the next step up from a point cloud. It is more useful and is accepted into more software packages than a point cloud. A common mesh file type you may have heard of is an .stl or stereolithography file which is the main file type associated with 3D printing.
If you were to take 3 adjacent points and join them with a triangular “surface” then you would have created a mesh. See the example below.

Which Scanner Do I Need?
Currently there is no scanner which will do everything. You wouldn’t be able to scan a building with the same scanner designed to scan small components. This section should explain the main different types of scanner and what they are used for.
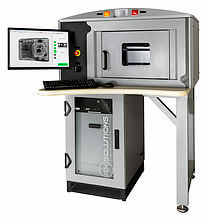
A CT (computed tomography) scanner is an x-ray inspection machine. It is used to capture both the external and internal shape of parts. 5 micron accuracy is quite achievable. Because of these advantages, this technique can be used to assess not only the shape of a part but also artefacts such as porosities, cracks and fibre analysis in composite parts.
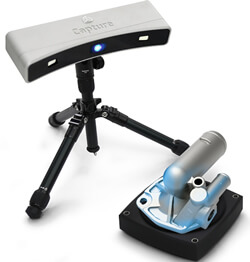
Often structured light or laser based systems, these are used to capture the external shape of parts. They are particularly useful for parts of a smaller size (<300mm) with simple geometries. The turntable is used to capture scans at set angular intervals. If you need to collect data from different angles not accessible from your single axis of rotation then a PCMM (portable coordinate measurement machine) may be a quicker solution.
PCMM Scanners
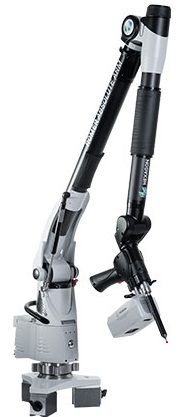
These are laser scanners which are integrated into a PCMM device. They are arguably the most versatile laser scanner available as they allow scanning from all angles as well as still delivering high accuracy data (+/- 50 microns). They also excel at scanning different material types in one pass which structured light scanners can find difficult.
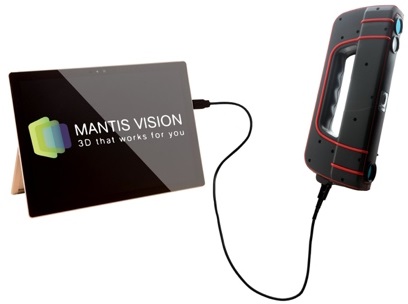
Hand held scanners offer dynamic, fast measurements of a scene or object. Often portable, they work just as well in a laboratory setting as they do out in the field. See how we used hand held scanners in a wind tunnel to aid the University of Southampton in their Project Icarus student project.
Terrestrial Scanners
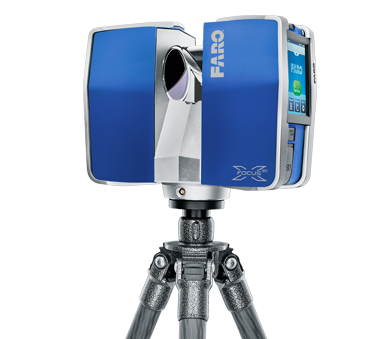
Mounted on a tripod these scanners are used for survey applications. Used in conjunction with targets or a total station they can quickly capture a scene. Ideal for capturing everything from vehicles to buildings.

Mobile Scanners
Mobile scanners can be fitted to cars, ATVs, boats and trains. They are able to capture high quality, survey grade data while moving. These are great for capturing long sections of road, complexes, entire sites and more.

All different types of scanner can produce a point cloud. Because of this their data sets can be combined in post processing. If you have a survey of a building using a terrestrial scanner, one could combine this data with a scan of a chair captured with a PCMM. This allows you to model the chair to a high level of detail and then position it accurately in the overall building model.
For more information about 3D Scanning, please contact us.

